Add Printer via Manual Entry
When to use Manual Entry
Manual Entry is the third tab in the Add Printer dialog. Use it when you want full control over every field, when Network Scan and IP Scan both fail, or when you're staging an entry for a printer that isn't on the network yet. Manual Entry has a Load button too, so you can probe from this tab if you want — it just doesn't lead with probing the way IP Scan does.
Step 1. Open the Manual Entry tab
Manual Entry Tab
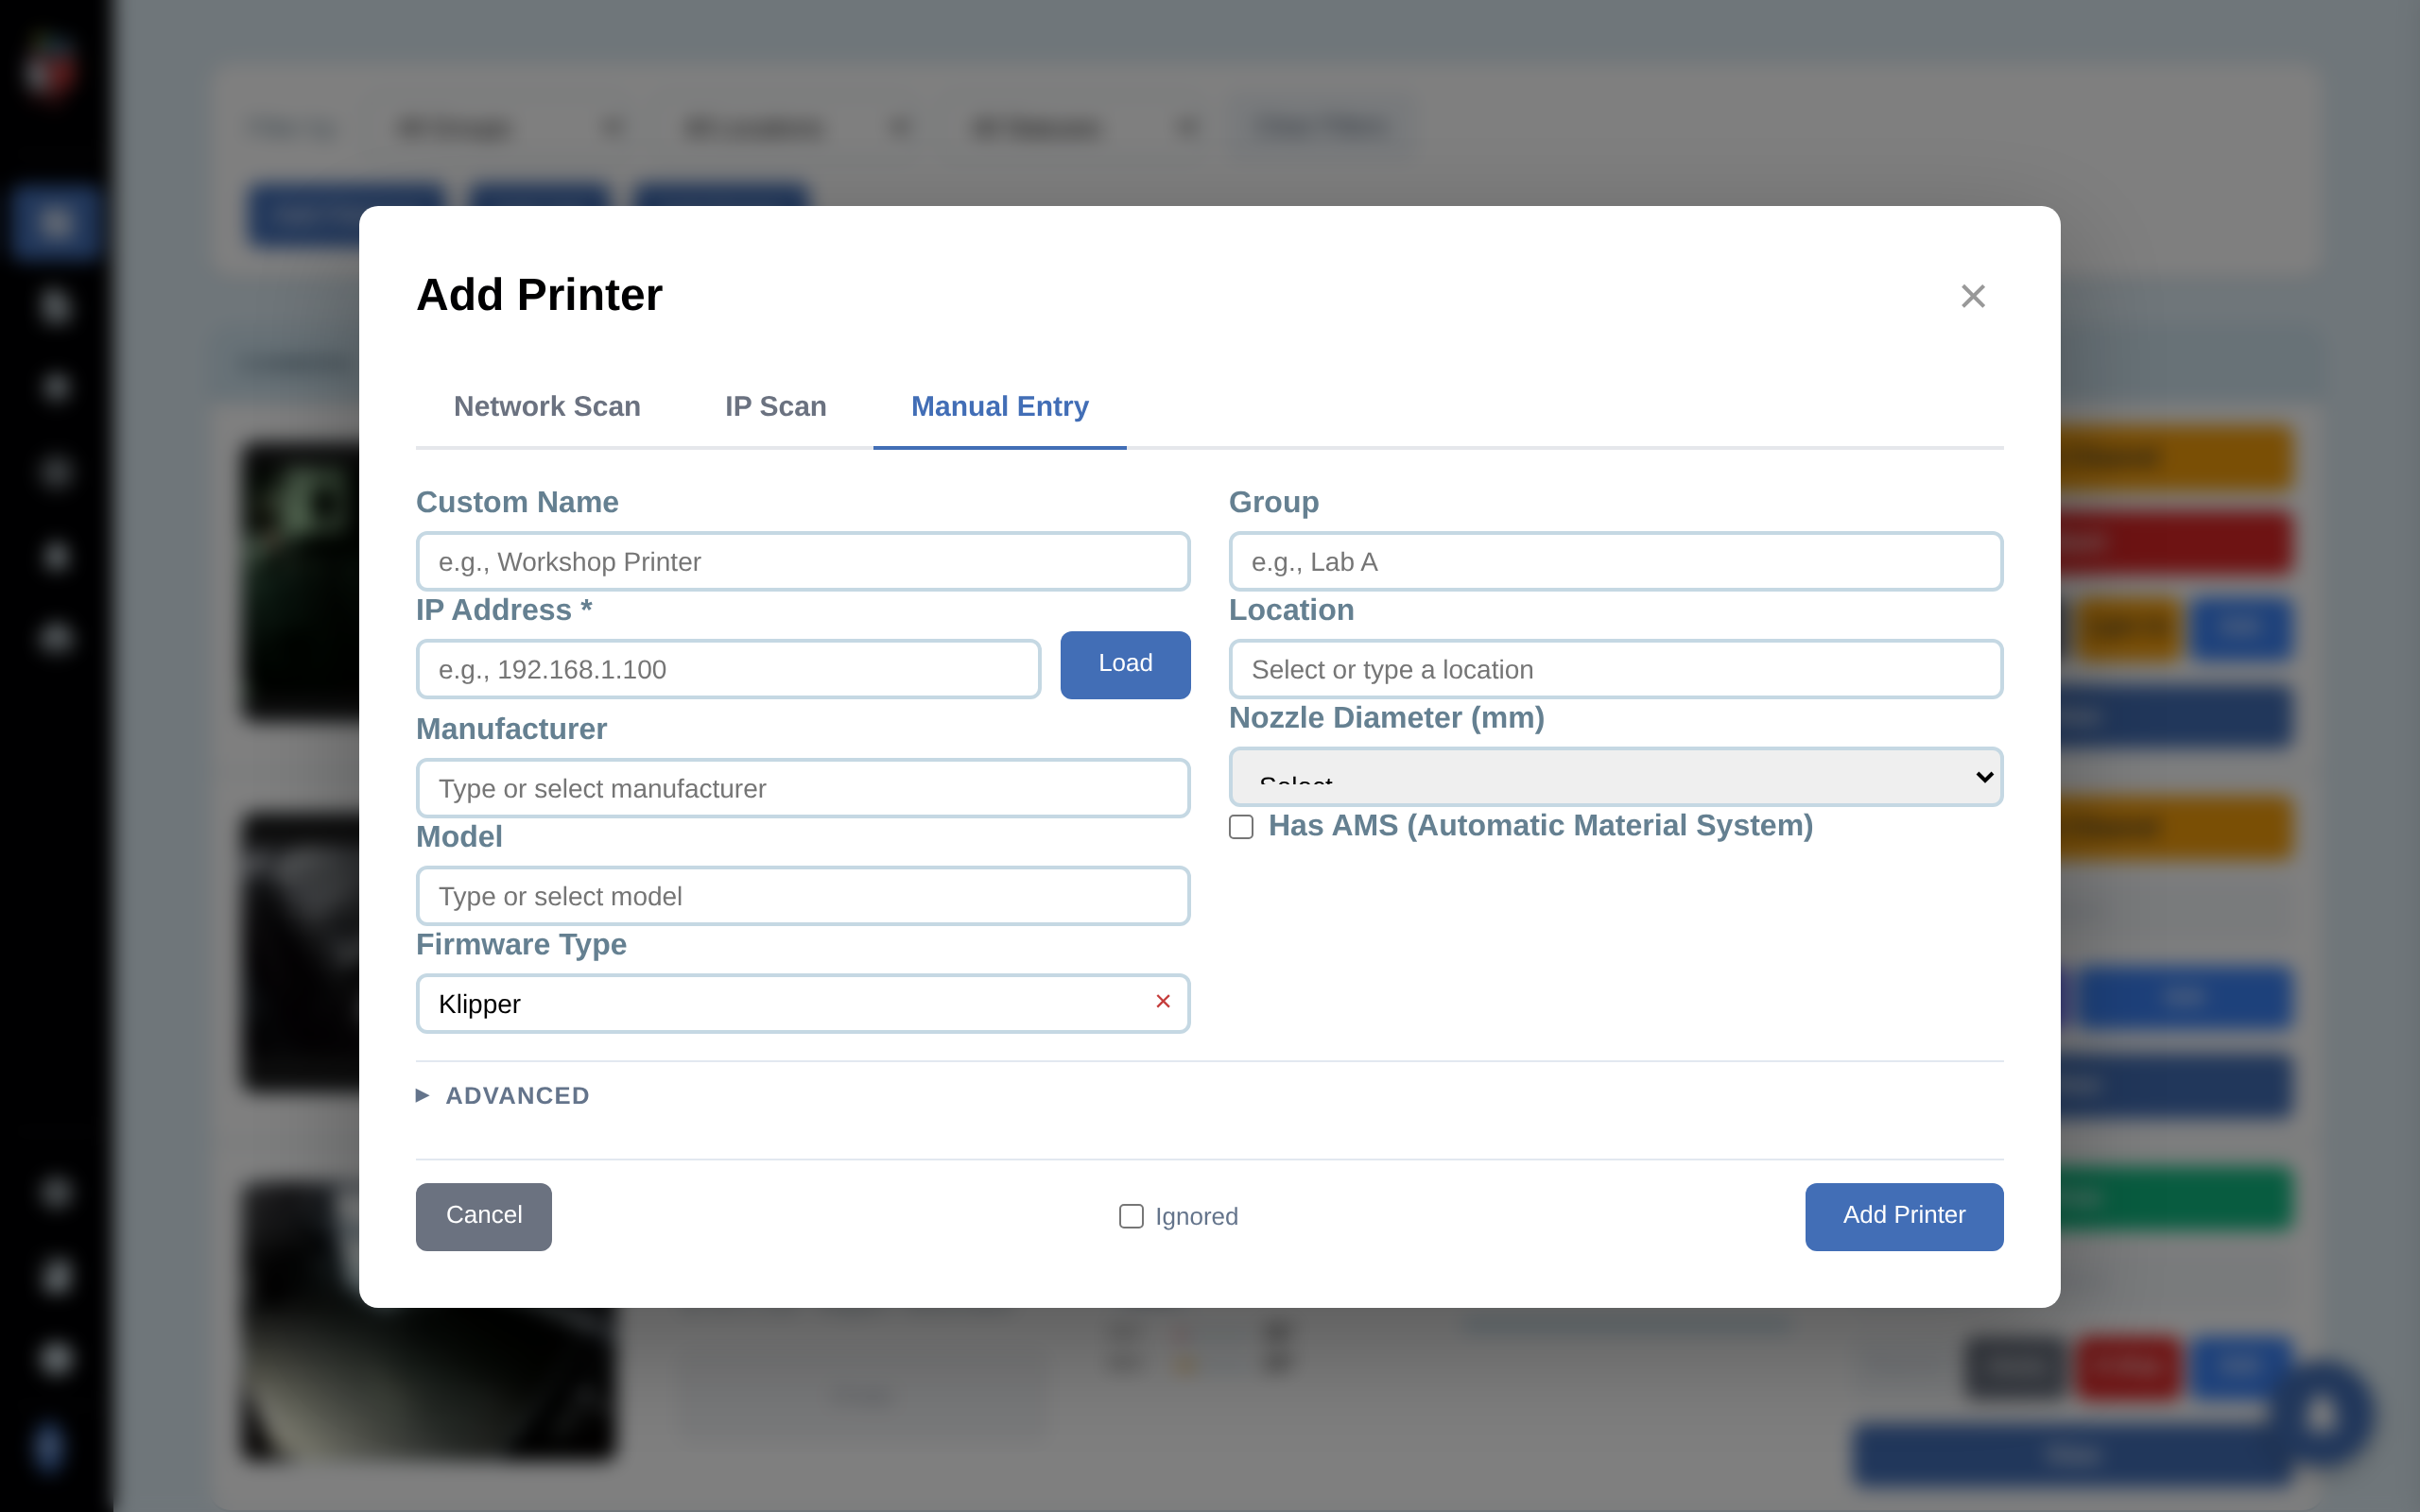
On the dashboard, click Add Printer. In the dialog, click the Manual Entry tab.
Step 2. Fill in the main fields
- Custom Name. Display name in the dashboard.
- IP Address. Required. Click the Load button next to it to probe the printer and pre-fill Manufacturer, Model, Firmware Type, MAC Address, Filament Slots, and the Ports list. If the printer isn't reachable yet, skip Load and type the fields manually.
- Manufacturer and Model. Searchable dropdowns; required for firmware-specific features.
- Firmware Type. Searchable dropdown, defaults to Klipper. This controls which credential field appears below.
- Group and Location. Optional filter tags.
- Nozzle Diameter. 0.2, 0.4 (default), 0.6, 0.8, or 1.0 mm.
- Has AMS. Check for Bambu with an Automatic Material System.
Step 3. Provide the firmware credential
The credential field that appears below the main fields depends on the firmware you select:
- Bambu Lab. Shows Access Code. This is the 8-digit LAN code printed on the printer's display under Settings > Network > LAN Mode.
- PrusaLink (Prusa Buddy). Shows Password (the PrusaLink password set in the printer's web UI). A separate Camera IP field also appears for PrusaLink models that stream from a different device.
- OctoPrint. Shows API Key. Generate one in OctoPrint at Settings > API and paste it here.
- Klipper / Moonraker, Duet, FlashForge. No credential needed for read access on a trusted LAN.
If the wrong field appears or no field appears, change the Firmware Type dropdown — the credential field is driven by that selection.
Step 4. Set advanced options if needed
Advanced

Click the Advanced row to expand. Most setups never need these fields; they're required for custom builds and unusual setups.
- Web UI. Non-default web-UI port (e.g. Mainsail on 4408 for a custom Voron build).
- MAC Address. Auto-detected after Load. Used to re-find the printer if its DHCP lease changes.
- Webcam Path. Override the default stream URL. Format: prefix + port + path (e.g. http://<ip>:80 + /webcam/?action=stream).
- Printer Name. Auto-detected from the printer's firmware, read-only.
- Filament Slots. Default 1, max 12. Set higher for AMS-equipped printers.
- Maintenance Cycle (hours). Print-hours between maintenance reminders. 0 disables.
- Ports. The printer-control ports PrinterMon will poll. Add rows for custom protocols. PrinterMon needs to know every endpoint it should monitor.
Step 5. Save
Optionally tick Ignored if you want the printer in the database but hidden from the dashboard. Click Add Printer. The new row appears on the dashboard. If you want to set up filament for this printer right now, click Manage Filament instead (or after) — it opens the per-printer filament panel.