Getting Started with PrinterMon
Create your PrinterMon.com Account

Fill out the create account form. Standard stuff.
The organization field will create a new org or send a request to the admin for an existing org automatically. Just spell it right.
Click Submit.
Congrats, you now have a Printermon account. Check your email to verify the address and login.
Login to Your Printermon Account
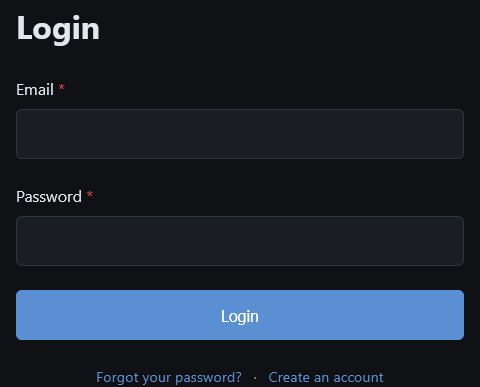
Visit https://printermon.com/login
Its a login. Pretty self explanatory no?
Install Printermon on Linux
PrinterMon is fairly light weight and should run comfortably on just about any Linux machine on the market.
Our dev machines are Proxmox VMs
Cores 4 @ 2.2Ghz
Memory 4GB
Disk 20GB - Largely determined by how large of a library of files you need to keep.
Begin by installing Linux and making a Printermon directory and moving into it.
mkdir printermon && cd printermon Then create your docker compose file.
nano docker-compose.ymlPaste the following into it.
services:
  printermon:
    image: printermon/printermon:latest
    container_name: printermon
    network_mode: host
    volumes:
      - ./userdata:/app/userdata
      - /var/run/docker.sock:/var/run/docker.sock
    restart: unless-stopped
CTRL+X To close.
Y to save the buffer.
ENTER to write docker-compose.yml
Then start docker.
docker compose up -dIf you encounter a permissions issue its likely you do not have access to the userdata folder that Printermon needs to store its data locally. (So it survives updates) Run the following.
/root/printermon/userdata && docker restart printermon
Navigate to http://your_ip:8888 and connect your node to your printermon.com account.
Connect Your Printermon Node To Your Organization
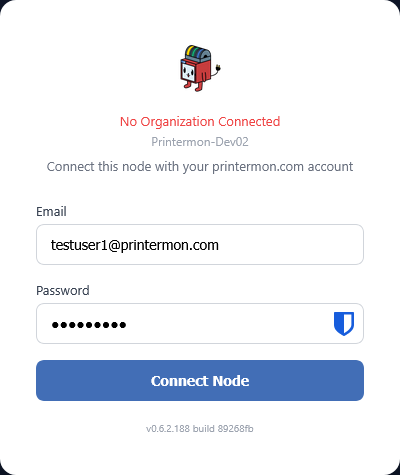
Visit your Printermon installation IP address.
Login with your organization owner credentials. (Only the organization owner credentials can connect a new node)
Click Connect node.
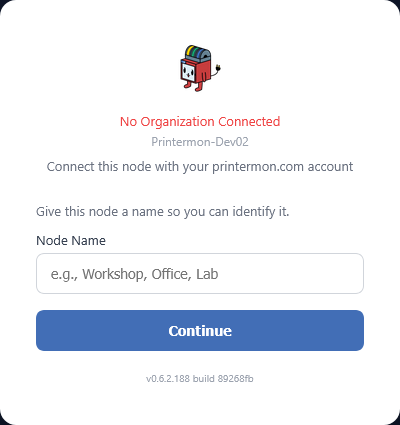
You will then be prompted to name the new node. The node will default to the hostname of the device unless you overwrite it.
Click Continue
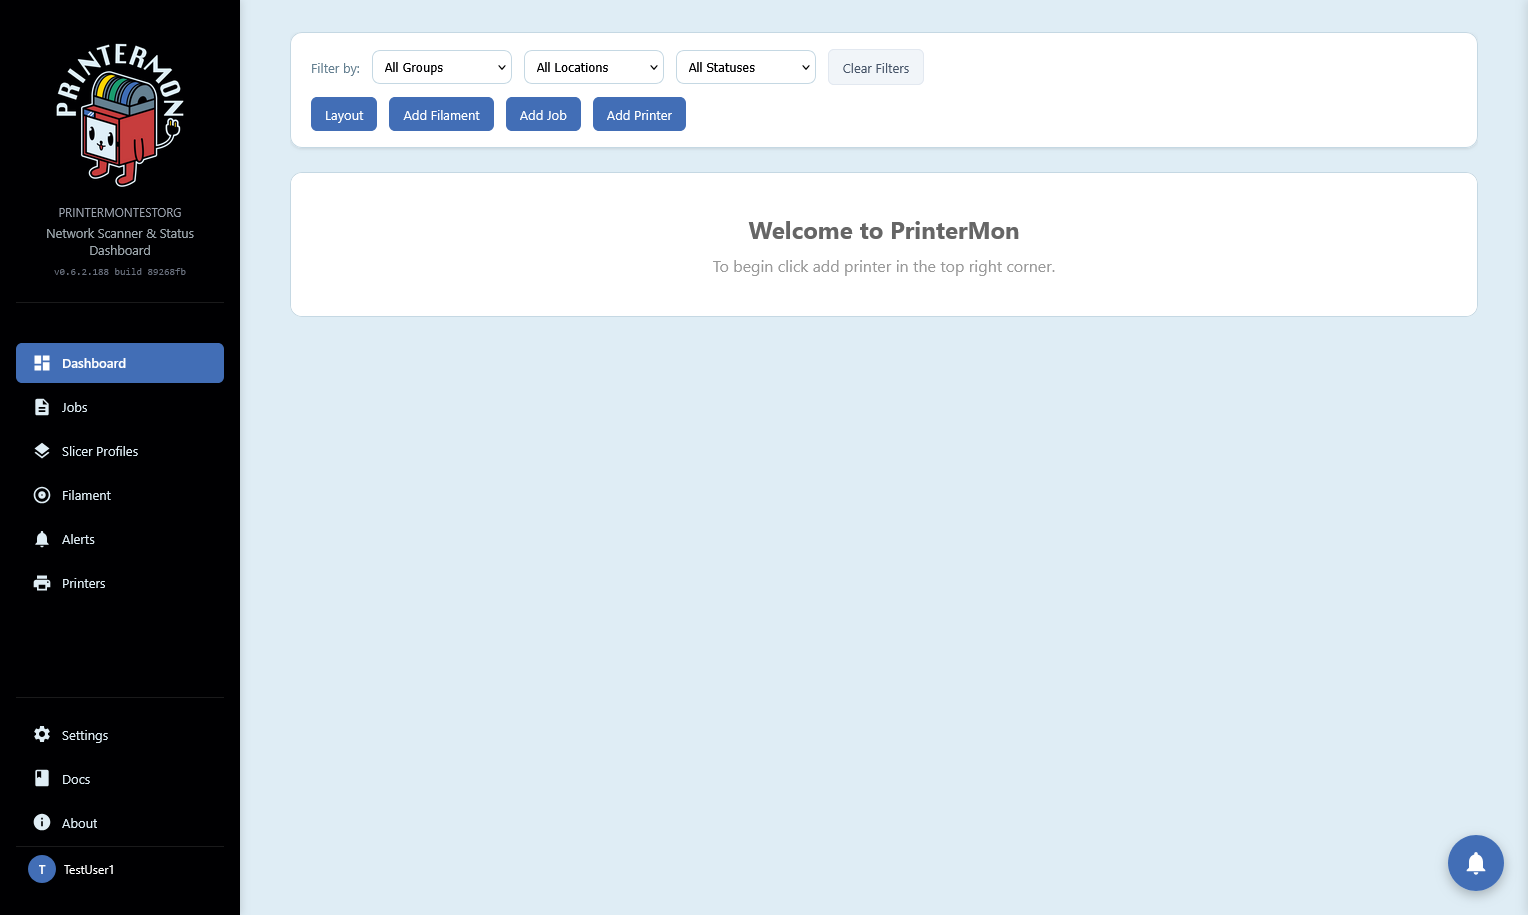
You will then be redirected to your dashboard where you can start adding printers.
Add Printers to Printermon
Add Printer via Network Scan
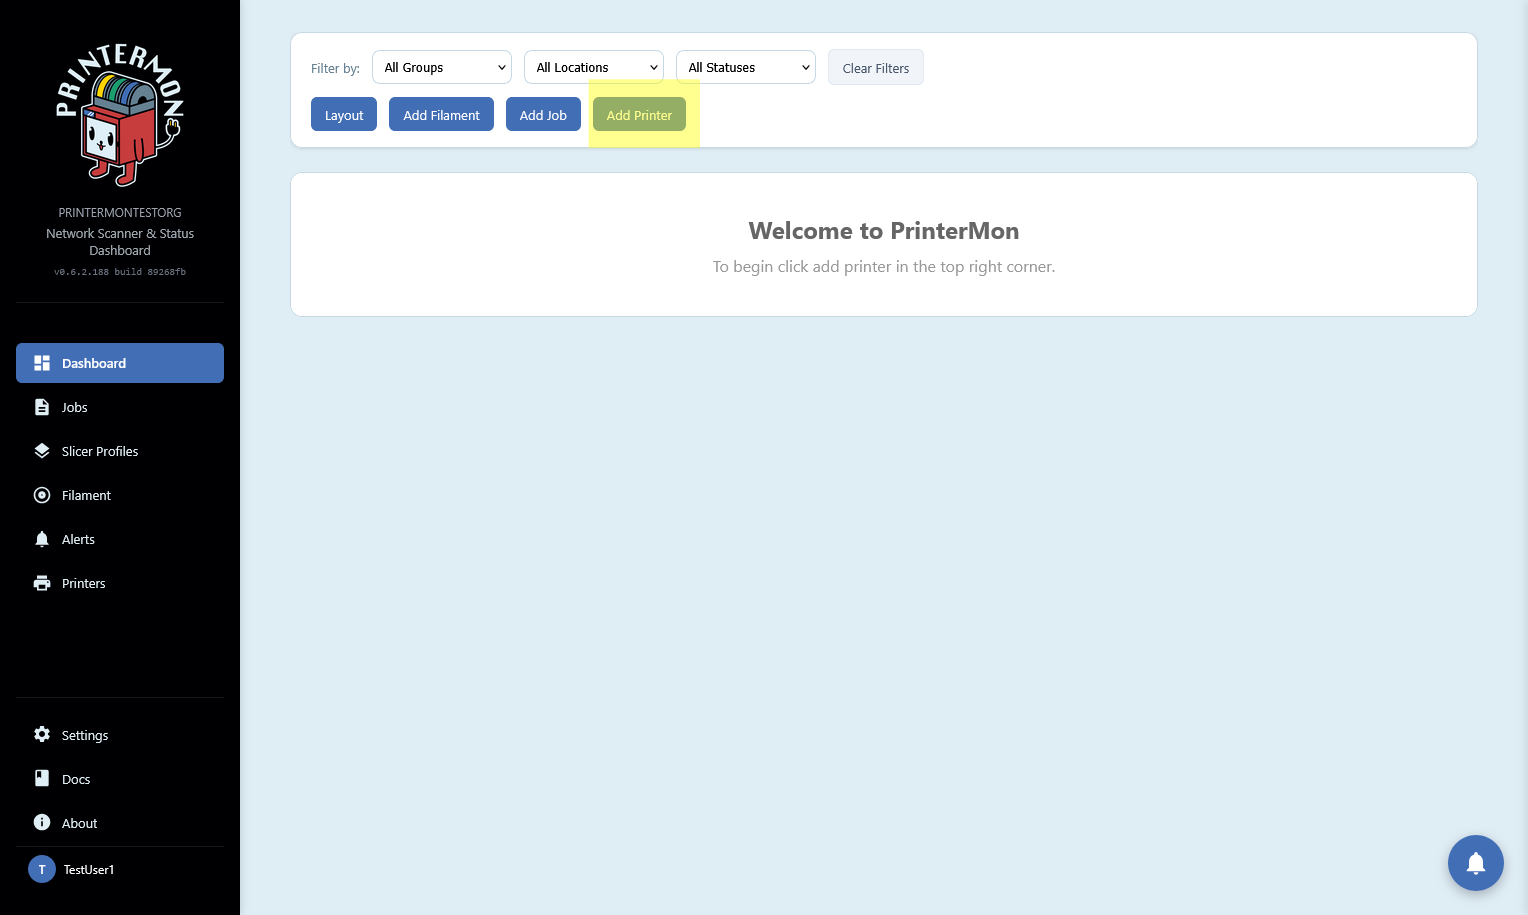
Click "Add Printer" on your dashboard.
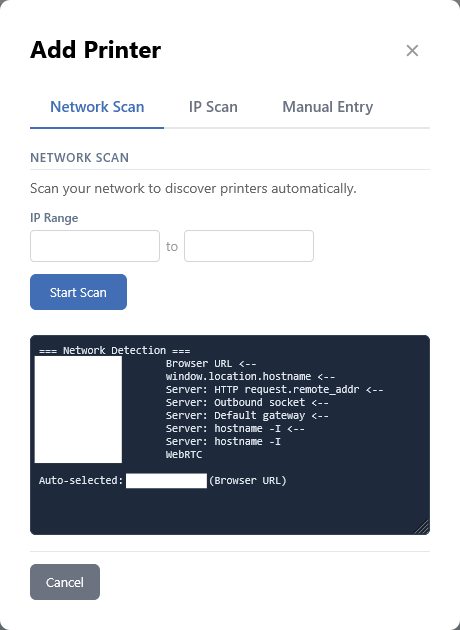
In the Add Printer modal. Fill out your IP address range if it is not autofilled, then click scan
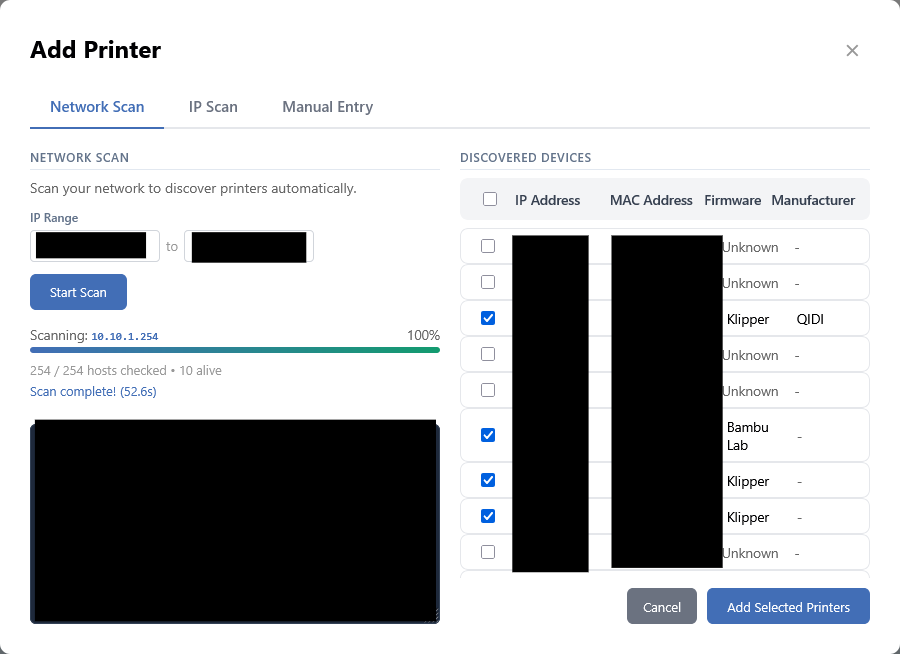
Once your scan completes you should see a selection of checkboxes with Ip addresses and Mac addresses. It will automatically detect printers if it can. (a forever work in progress feature because of how firmware is)
Select the printers you want to add and click next.
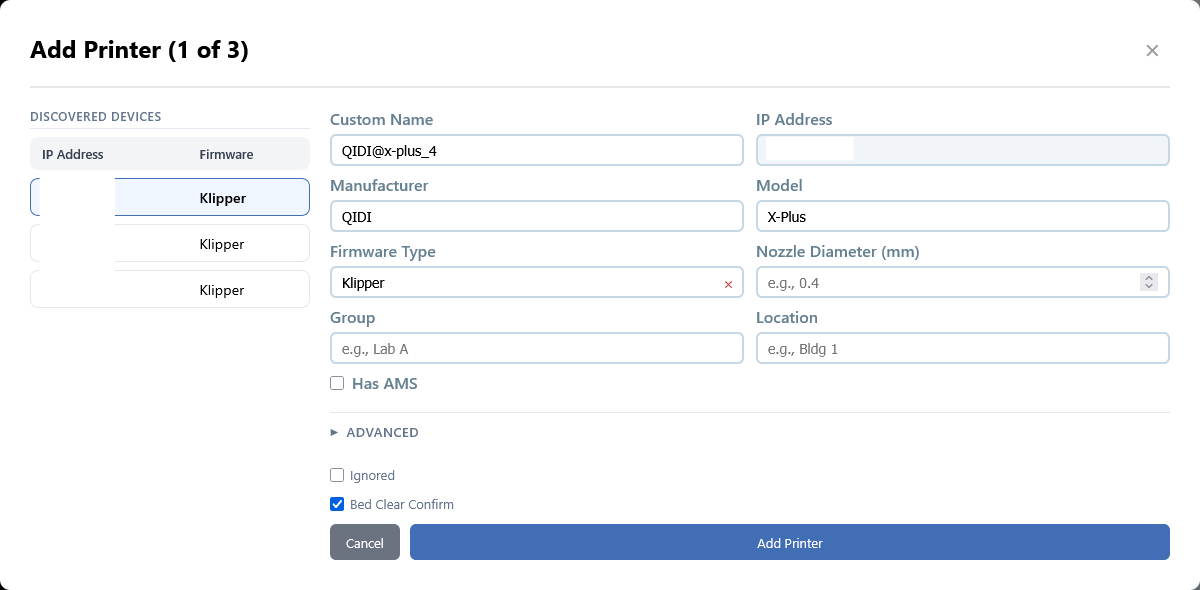
In this form we will confirm or update any information the auto detector found. If you have a very custom printer like a Voron, the advanced section has additional configuration options.
Repeat for each printer.
Once complete you will be redirected to the dashboard where your printers should be visible.
Add Printer via IP Scan
Click "Add Printer" on your dashboard.
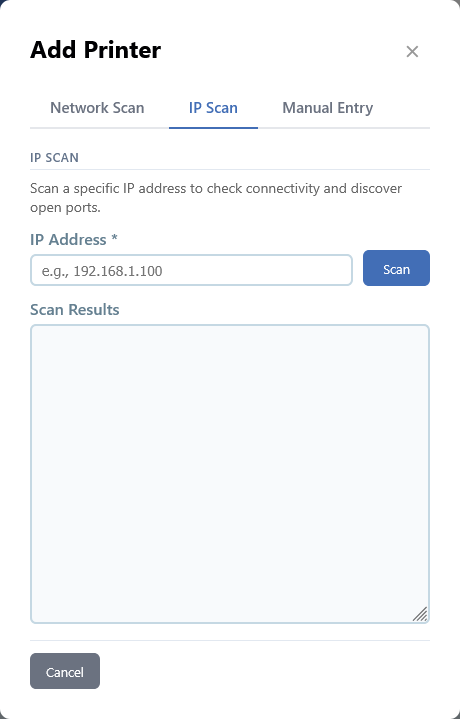
In the Add Printer modal, click the IP scan tab, then type in the IP address you want to scan.
Click Scan
Once the scan finishes you will be redirected to this form. Here we will confirm or update any information the auto detector found. If you have a very custom printer like a Voron, the advanced section has additional configuration options.
Click Add Printer
Once complete you will be redirected to the dashboard where your printers should be visible.
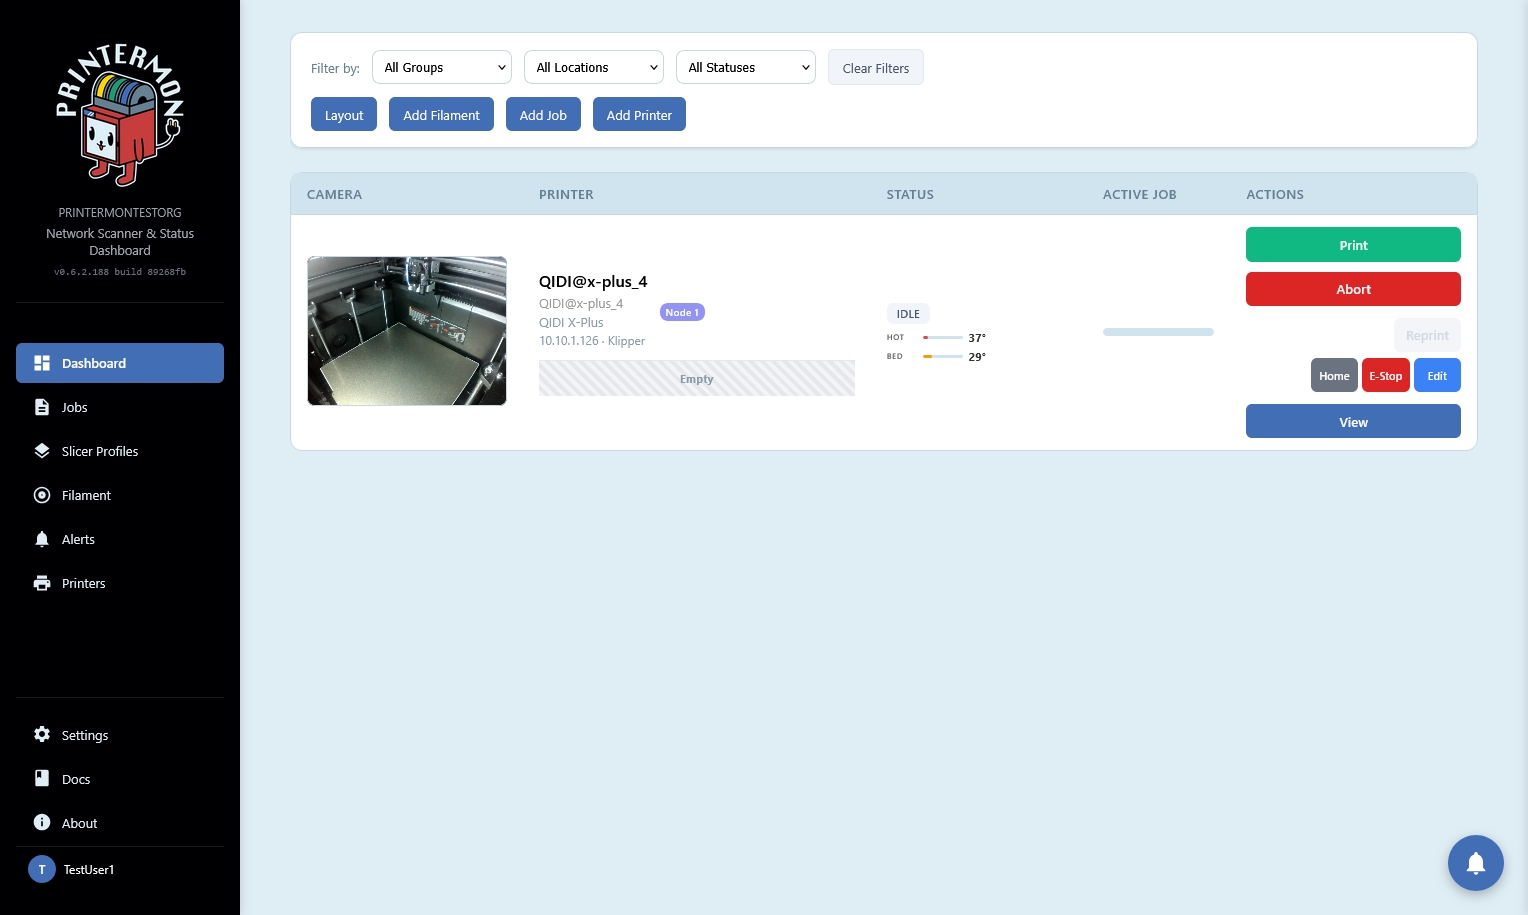
Starting A Print - Dashboard Card Arc
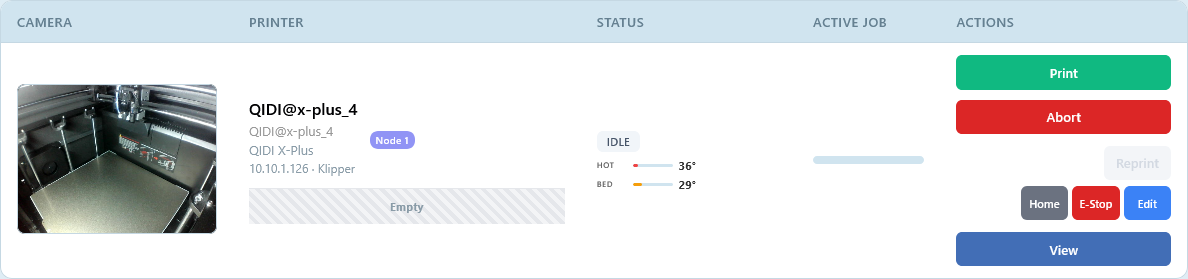
On the dashboard printer card, click print.
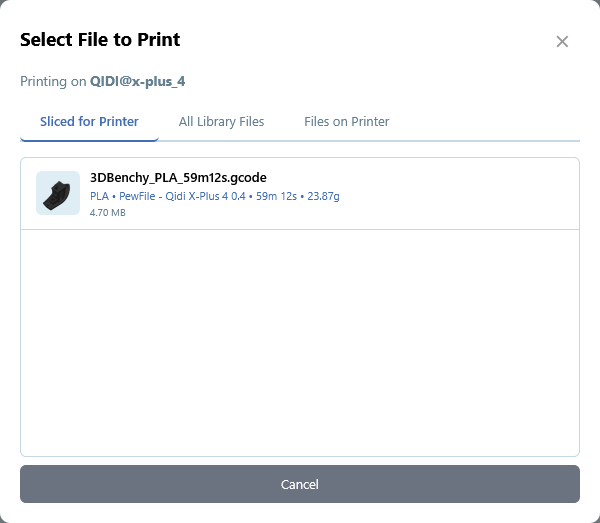
In the Select File modal:
The first tab are files sliced for your printer. We set this with the slicer profile data when we uploaded the file.
Click the file
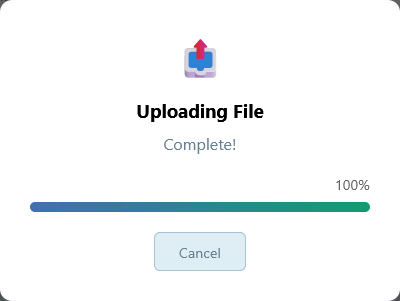
Wait for the loading window to complete.

The status on the dashboard card will change to Starting, then Printing and Complete when its done.
And thats the basics. Enjoy.